British Brewer

Recreating the perfect British Pint

Archive for the 'Ingredients' Category

06 April
2Comments

Tips and Tricks: Check your hops alpha acid

This tip may seem obvious but I have only just started doing it. If you have a brew you like to make over and over this tip is essential in order to produce consistent quality and taste every time.

I recently re-brewed my Flowers Original Clone (updated the recipe to a Partial Mash).  In the original recipe we used 0.5oz (.25oz for  a half batch) of Target hops. The alpha acid for Target is typically in the 9-12% range. In the original recipe the hops I used had an alpha acid value of ~10%.

So when I came to re-brew 6 weeks ago I noticed my new batch of Target hops were 11%. So I decided to go back to BeerCalculus at Hopville (and my spreadsheet) and recalculate the IBU’s.  At 11% alpha acid for the bittering hops I calculated I needed to reduce the amount of the Target hops from 0.5 to 0.4oz. Good job I did because the ale is in the keg and it tastes absolutely fantastic 🙂


Share
02 May
1Comment

Malt: Part II – Measuring Diastatic Power

English Marris Otter

In the first post of the series on Malt we reviewed the different categories of malt and the enzymes that convert the starches into fermentable sugars.  In this post we will review how to measure the effectiveness of the conversion.  To do this we need to understand the “diastatic power” (DP) of malt. The DP measures the amount of diastase (another name for Alpha Amylase), enzyme present in the grain.  In general, the hotter a grain is kilned, the less its diastatic activity.

The DP of malt is measured in degrees Lintner (°Lintner or °L, which is the same symbol used for Lovibond, which measures colour).  JECFA, the Joint FAO/WHO Expert Committee on Food Additives, defines degrees Lintner as follows:

A malt has a diastatic power of 100 °L if 0.1 cc of a clear 5% infusion of the malt, acting on 100cc of a 2% starch solution at 20°C for one hour, produces sufficient reducing sugars to reduce completely 5cc of Fehling’s solution.

The calculation of °L for a type of grain is typically done by the manufacturer and not by the homebrewer. As a rule of thumb though the total grain bill of a mash should have a DP of at least 40 °L in order to guarantee efficient conversion of all the starches in the mash to sugars.

British Pale malts tend to be in the 35-40 °L range and therefor only have enough DP to convert its own starches and none of the Specialty Malts. This would explain the heavy use of Crystal Specialty Malt which has no enzymes and introduces only unfermentable sugars to the wort.  European Malts have a DP of 100 °L and American Malts range from 125 to 160 °L and are capable of converting both its own starches and that of other grains in the malt bill.  This explains why many American brews use specialty malts which contain starches but no enzymes, such as Brown and Chocolate Malt due to higher kilning temperatures. American 6-row malts have DP’s over 160 °L.

So when building an all grain recipe consider carefully the malt bill and the DP of the malt used. If you use Specialty Malts which contain starches and wish to convert them remember to us a base malt with a higher DP such as American 2 or 6-row,

Now we understand how malt converts starches to fermentable sugars we can move on to calculate how much malt we need to make a recipes target Specific Gravity.

Share
21 April
1Comment

Malt: Part I – Base Malts vs Speciality Malts

English Marris Otter (2_Row Barley)

I have been working on getting my malt post together for what seems like an eternity. I have been finding blogging a difficult task with my work and family commitments.  I managed to get out of work at a reasonable hour this evening and decided I would work on getting my first Malt post out the door.

Over this series we are going to focus on the characteristics of malt, how it works, how to calculate the OG of the wort and then switch to looking at specialty malts and how they add flavour, colour, head, and improve mouthfeel.  But first I thought we should answer a very basic question.  What is the base malt, what is specialty malt and what is the difference between them?

First up what do they have in common – they are both barley.  Base malts impart colour, some flavour and supply the fermentable sugars.  Speciality malts provide little to none of the sugars but have a big impact to the colour and flavour.  First lets remind ourselves of the malting process first covered in my getting started post.  Malt is the product of soaking grains in water until they begin to germinate. The grains are then heated to halt the germination process.  This 2-stage “malting” process causes the grains to produce essential enzymes required to modify the grain starch into sugars and enable the yeast to do its job.

Base Malts
Base malts make up the bulk of the a batch and are typically derived from one of 2 types of barley, either 2-Row or 6-Row.  Base malts are created by drying the barley at a sufficiently low temperature to preserve enzymes (alpha and beta amylase) which convert starch into sugar (the same enzymes in saliva that make peanut butter and sour cream separate). It is these enzymes that are critical to the brewing process.  Without them the grain starch would not get converted to fermentable sugars. The sugars can be extracted from the barley’s own starches simply by soaking the grain in water at a controlled temperature in a process called mashing.

The most common form of base malt is Pale Malt, typically lite in colour and neutral malt flavour.  Another type of malt with high enzyme levels is Mild Malt, kilned at slightly higher temperatures to produce a nutty flavour. Other base malts include Vienna, Pilsener and Munich.

Specialty Malts
Specialty malts have no enzymes and therefor little to no diastatic power (ability to convert starch into sugars). These types of malt make up a smaller quantity of the grist but have a significant impact on the colour and flavour of an ale.  Most specialty malts are pale malts that have been kilned at higher temperatures and in doing so impart darker colours and roasted flavours.  The higher kilning temperatures do not preserve the enzymes. Typical specialty malts include Chocolate Malt, Black Malt and Brown Malt.

A special type of malt used a great deal in British Ales is Crystal malt.  Crystal malts are high-nitrogen malts which are soaked in water and roasted before kilning. They produce overly sweet toffee-like flavours and the sugars are sufficiently converted that they can be steeped without mashing to extract their flavor. Crystal malts are available in a range of colours, with darker-coloured malts kilned at higher temperatures, producing stronger, more caramel-like overtones. Some of the sugars in crystal malts caramelize during kilning and become unfermentable adding a sweetness to a beer.

So far the recipes we have covered have all been extract brews where the base malts are replaced with liquid or dried malt extracts.  The sugars have already been extracted and all we have to do is steep the specialty malts to extract flavour and colour.  But here is the twist and a major difference between extract and all-grain brewing.  With the exception of Crystal malts, which have no fermentable sugars remaining, other specialty malts such as the Chocolate, Brown and Dark malts may have no enzymes present BUT THEY ARE STILL LOADED WITH STARCHES.  So when an all-grain brewer adds his specialty grains to his grist there are enough enzymes present in the base malt to convert the specialty grains starches also.  I am very ready to retry some of my favorite recipes as all-grain to see the impact the mashing process has on the specialty grains.

There is a process called mini-mashing which adds a smaller, more manageable, amount of base malt to the specialty malt to convert the starches and then adding malt extract to the boil to get the OG gravity to where it needs to be.  In my humble opinion if I am going to go all-grain I am going all in.

Next up we will review how to use the diastatic level of the malt bill to predict the OG of the wort.

Share
06 March
4Comments

Hop Bursting

HopsAs those of you who read this blog will know I have been talking about a technique called hop bursting recently. I first tried it back in Nov 2009 whilst brewing my Dog Fish Head 90min without really knowing how the technique worked. I came across it again last week when I brewed Northern Brewers 115th Dream Imperial IPA, which shipped with over 1 lb of hops.  How can you add 1 lb of hops to a 5 gallon brew and it not taste disgusting? I was curious and wanted to find out more, especially given how clean the bottom of boil kettle was where the hops had settled while cooling.

First up lets quickly review the big hop post I did a few back. First thing to remember are the Alpha Acids, these cause bittering and are not very water soluble so require an hour of boiling to fully extract. Then there are the Beta Acids, these are water soluble and actually evaporate if left too long in the water. Beta acids provide the hop aroma and flavour.  The more the beta acids evaporate the less the aroma which is why we have flavour additions with 10-15mins of a boil to go and aroma at 0 mins.

Hop bursting is a technique used to impart massive amounts of hop flavour and aroma by adding large amounts of hops at the end of the boil, typically beginning at the last 20 mins.  Some bitterness will be extracted (use the formula in the hop post and replace the 60 with 15 and play around with the hop quantity and see how much more you would need) so in order to get the same level as a 60 min boil we need a lot more hops. Here is a simple example. In the hop post we calculated the IBU’s for a recipe with a 60 min and a 15 min addition, it was approx 29 for a 2.5 gl batch using 1.2 oz of hops.  What if we want to create a 29 IBU recipe with a big hop aroma and flavour using hop bursting with no bittering hops at the beginning of the boil.

Here is the same formula used in the hop post but this time using 4 additions a 15 min, 10, min, 5 min and 1 (assuming we are a using a generic 4.5% alpha hop in pellet form, same batch size and OG).

First calculate the utilization for each addition

15 min: ( 1.65 * 0.000125^( 1.060 – 1 ) ) * ( ( 1 – 2.72^( -0.04 * 15 ) ) / 4.14 ) = 11.54%

10 min: ( 1.65 * 0.000125^( 1.060 – 1 ) ) * ( ( 1 – 2.72^( -0.04 * 10 ) ) / 4.14 ) = 8.43%

5 min: ( 1.65 * 0.000125^( 1.060 – 1 ) ) * ( ( 1 – 2.72^( -0.04 * 5 ) ) / 4.14 ) = 4.64%

1 min: ( 1.65 * 0.000125^( 1.060 – 1 ) ) * ( ( 1 – 2.72^( -0.04 * 1 ) ) / 4.14 ) = 1%

Next calculate the IBU for each addition given its utilization and add them all together to make the final total.

15 min: 11.54 * ( 0.5 * ( 4.5 / 100 ) * 7490 ) / 2.5 = 7.78

10 min: 8.43 * ( 1 * ( 4.5 / 100 ) * 7490 ) / 2.5 = 11.37

5 min: 4.64 * ( 1 * ( 4.5 / 100 ) * 7490 ) / 2.5 = 6.25

1 min: 1 * ( 3 * ( 4.5 / 100 ) * 7490 ) / 2.5 = 4.06

Total IBU = 29.46

So we have an ale with the same IBU made with the same hops as the traditional bittering method except the hop load is 5 1/2 oz as compared with 1.2 oz giving us an really BIG hop flavour and aroma. Another advantage for homebrewers like myself that do not own filtration equipment is strong hoppy IPA’s can be made without the need for a dry hop addition and all the additional complexities that come along with the process.

So go ahead and try the NB recipe, its a 1 lb of hops for a 5 gallon brew, have no idea how it will turn out but I love the quote on the web site which I will end this post with:

If you serve this beer to a Michelob Ultra drinker, he or she will cry. If life were a 1950s horror flick, this I2PA would climb out of the fermenter and turn on its master. Your dentist does not want you to brew or drink this beer. Sorry in advance about your tooth enamel

Share
10 February
15Comments

Hops

Hops Thought it was time for the next installment in our ingredients deep dive. So far we have covered water and the mighty yeast so I thought it was time to take a deeper dive into one of the more complex and underrated of all the ingredients in ale, hops.  I say underrated because hops do more than just provide the bitter flavour to balance out the sweet malt. Hops also contribute to the aroma and arguably more important have anti-bacterial properties that favor brewers yeast over bacterias keeping beers fresh and allowing a hopped ale to age without spoiling.

I have often wondered how hops came to be used in beer. I have to admit they are not an obvious choice.  Fermentation of fruit and grains has been an activity well documented in history going back into ancient times and I am sure much experimentation was done to improve flavour and longevity, especially given the quality of water and food was not a guarantee.  We take for granted today our near universal access to clean drinking water in the modern western world, something that was not a given for brewers of old.

So I went online and through my history of brewing books and found all kinds of explanations as to how hops came to be used.  In the end I came back to an old faithful (though I don’t think the author, Martyn Cornell, would not appreciate the old bit), my favorite beer history blog, Zythophile.  In a post dated Nov 20th 2009 titled “A short history on hops” Mr Cornell provides a well researched and thorough piece on the hop and its rich history.  I will not try to re-write the piece, I could never do it justice and I would probably make a mistake, something Mr Cornell would get very upset with. He is not only a famous beer historian but a beer myth buster also and not afraid to speak out against inaccurate and lazy research. The one paragraph that leapt out of the page (or browser) was the following”

Book I, Chapter 61, “De Hoppho”, or “Concerning the hop”, says of the plant: “It is warm and dry, and has a moderate moisture, and is not very useful in benefiting man, because it makes melancholy grow in man and makes the soul of man sad, and weighs down his inner organs. But yet as a result of its own bitterness it keeps some putrefactions from drinks, to which it may be added, so that they may last so much longer.” (Abbess Hildegard of Bingen (1098-1179), mystical philosopher and healer, published a book called Physica Sacra, which translates best as “The Natural World” (circa 1150).

The author then goes on to note:

What probably kept the usefulness of hops from being discovered for so long is that the bittering, preserving resins in hop cones are not very soluble, and the hops need boiling for a long time, around 90 minutes, for what is called isomerisation

Please read the rest but the above brings us to the most important discussion around hops and brewing, how they work.  Male and female flowers form on separate hop plants. The hops used for brewing are the female flower cluster, which contains many small flowers.  Female hop flowers, also called cones, are harvested in August-September and dried.  The female cones are important because they contain lupulin glands that contain alpha and beta resins and other essential oils used to impart specific aroma and flavour characteristics.  Alpha and beta resins are measured as the % weight of the hop cone and displayed on the packaging as alpha acids and beta acids.

ALPHA ACIDS – contain the chemical agents Humulone, Cohumulone and Adhumulone and are used to impart bitterness, the higher the alpha % the more bitter the hop.  Alpha resins are not very soluble and require at least 60 mins boiling to extract the bitterness.

BETA ACIDS – Beta resins and hop oils are used to impart flavour and aroma.  Unlike the alpha acids these oils are water soluble and will quickly boil off in the kettle so cannot be in the pot for too long.  A hop will impart flavour if boiled between 5-15 mins and aroma if boiled for 1-3 mins.

An important note to brew calculator users.  The hop alpha and beta % used by these applications are averages for a particular variety.  The actual resin % does vary year to year and even crop to crop from the same region.  It is important to note the published %’s on a package prior to use and recalculate your recipe hop levels to ensure you maintain the appropriate bitterness and flavour characteristics.

A well designed and useful bitterness and flavour hop reference chart can be found here with another great reference on creating flavours found here. This chart and others like it can assist us when it comes to decide the type of hops we should use and the quantities and timing during the boil to attain the flavour and aroma characteristics for our final brew.  Experimenting with flavour is an art and something every homebrewer should have fun with. For example if I were to use the above chart to brew a great spicy, citrus American IPA consider the Williamette as your flavour and aroma hop.

While flavour and aroma are part of the art of homebrew, bitterness is more the science.  Bitterness is measured in most calculators and modern recipes in International Bittering Units (IBU’s).  There is debate as to the most accurate IBU formula for small batch homebrews but it appears that most books and online resources use the Tinseth formula created by hop head Glen Tinseth. Measured in parts per million (ppm), if you do not have access to a brewing calculator or just enjoy doing the brew math by hand here is the Tinseth formula for estimating a brews IBU:

IBU = Utilization * ( oz of hops * ( Alpha Acid% / 100 ) * 7490 ) / Gallons of Wort

Utilization refers to how much of the alpha acid is actually used and is dependent primarily on the boil time, but is also affected by specific gravity of the wort and whether the hops used are pellets or whole hops.  I will not use this post to get into a discussion on the use of pellets over whole leaf except to say I use pellets.  In my experience they are easier to store and stay fresh longer.  Typical utilization %’s are in the range of 15 to 25% depending on the length of the boil. Pelletized hops have about 10% more bittering potential than whole hops because the soft resins have been upset and made more available during the pelletizing process.   To calculate utilization using the Tinseth formula use the following (for pellet hops add 10% to the final value).

Utilization = ( 1.65 * 0.000125^( OG of the wort – 1 ) ) * ( ( 1 – 2.72^( -0.04 * Hop Boil Time ) ) / 4.14 )

Taking the Theakston Old Peculier brew I researched last week as an example with an IBU target of 29 and the research indicating the use of Fuggle hops. The Fuggle pellets I have in stock have a stated alpha of 4.5% so using the formula above, the alpha %, the batch size and target OG for the brew of 1.060 I would calculate the following:

Step 1 – calculate utilization for both the 60 mins and 15 min additi0ns (adding an additional 10% for pellets)

60 min: ( 1.65 * 0.000125^( 1.060 – 1 ) ) * ( ( 1 – 2.72^( -0.04 * 60 ) ) / 4.14 ) = 21.14% (whole hops) or 23.25% (pellet hops)

15 min: ( 1.65 * 0.000125^( 1.060 – 1 ) ) * ( ( 1 – 2.72^( -0.04 * 15 ) ) / 4.14 ) = 10.5% (whole hops) or 11.5% (pellet hops)

Step 2 – calculate the IBU for the final brew, you may need to

play around with the hop quantities to get the final IBU right. Remember that higher quantities of later addition hops lead to a more intense the flavour and aroma without adding to the bitterness.

60 min: 23.25 * ( 0.67 * ( 4.5 / 100 ) * 7490 ) / 2.5 = 21

15 min: 11.5 * ( 0.53 * ( 4.5 / 100 ) * 7490 ) / 2.5 = 8.25

IBU = 29.25 (21 + 8.25)

Hope this has helped. I have included a basic excel spreadsheet with the above example.  Have fun, remember to always check the alpha % and adjust your recipe accordingly, research recipes from your favorite brews to see the types of hops used and investigate the websites of your favorite commercial brews as they often post the hops they use and associated tasting notes. Next up the Malt and yes there will be more math.

Share
20 January
4Comments

Brewing on a budget – Borrowing Yeast

Yeast StarterAs part of the continued deep dive into specific ingredients and techniques (so far we have dug deeper into yeast and reviewed water treatment) I thought a further post on yeast was in order especially given the cost of quality yeast. Its expensive.

As I mentioned in an earlier post on why I brew, its not just the pleasure of drinking high quality fresh ale, or the enjoyment of simply brewing, but also the lower cost of home made ale that stokes my passion for homebrew.  Brewing your own real ale is very economical. I was reminded as I toured the liquor store today and noticed a 6 pack of Fullers ESB on the shelf for $12 (or $2 a bottle), and remembered I have 2 cases (48 bottles) of my own version (though still not up to Fullers quality) in my cellar that cost me approx $4.75 per 6 pack ($0.79 per bottle).  Given I like to use the more expensive liquid yeast from Wyeast or White Labs I find yeast is the most expensive ingredient in my brews. These yeasts have reliable attenuation percentages and produce very consistent results every brew. I have never had a bad batch.  But they are expensive, most being over $6 a packet.  What also doesn’t help is I am often left guessing what type of yeast to purchase for a recipe, e.g. is it a London Ale, London Ale III, or a Thames Valley strain?

But what if I could get the right yeast and pay nothing (except for the one time cost of a single bottle of beer). I could bring the price of a 6 pack of Fullers ESB down to $4 (or $0.66 per bottle) helping my budget somewhat and deliver an even closer match to the original I am trying to clone.

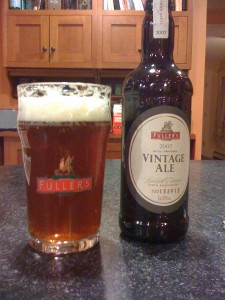
This brings me to the main reason for the visit to my local quality liquor store (as I rarely buy beer except for research purposes), to acquire a sample of 2007 bottle conditioned Fullers Vintage Ale.  As noted in my prior post, I am unhappy with the results of version 1.0 of my Fullers ESB clone.  As part of my research into figuring out how to improve the recipe I have been investigating how to improve the malt, hops and yeast mix.  I have managed to finally find a reliable source for the appropriate hops but got stuck on the yeast. Fullers, like most breweries, is very secretive around its yeast as so much of the flavour and character of the finished ale comes from it.  During my research I was browsing some recipe web sites and found a post on a bulletin board where a homebrewer from England was trying to replicate Fullers London Pride using some yeast grown from a yeast sample he had lifted from some bottle conditioned Fuller 1845 Ale.  Much like homebrew, bottle conditioned commercial beers are naturally carbonated in the bottle using residual yeast and priming sugar leaving a sediment on the bottom of the bottle. The sediment is rich with yeast cells and, with a little care and attention, these cells can be reactivated and grown to be used again in whatever beer you choose. In my case any Fullers clone I might make in the future.

But isn’t all beer sold in the USA pasteurized? I always thought so. So what commercial beers are out there that we could use to create our own free supply of yeast?  The answer appears to be not many.  As a rule almost all imported bottled and keg beers are pasteurized, the reason given to preserve freshness and enhance shelf life (though this point in hotly debated, I can attest to having regular gravity beers in my cellar for months and they continue to improve with age).  Furthermore almost all domestic US bottled beer is also pasteurized though domestic US keg beer is typically unpasteurized and “fresh” (with the exception of the mega-breweries such as Bud who pasteurize everything).  But recently the rules appear to be slowly changing. It is now possible to get imported and domestic bottled conditioned ales for higher gravity brews. I have noted Ringwood, Fullers 1845, Fullers Vintage Ale, and Sam Smiths Organic Ale from the UK and Shipyard Barleywine and Sierra Nevada from the US all available unpasteurized and bottled conditioned in the US market.

So how do we take a sample of bottled conditioned ale and re-culture it for use in your typical 5 gallon batch of homebrew?

  1. First acquire some bottled conditioned ale that matches either the style you are shooting for or from the same brewery that brews the ale you are attempting to clone (chances are its the same strain)
  2. Pour yourself a drink, make sure to save ~20% of the ale bottle, including all the sediment from the bottom
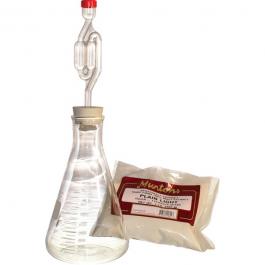
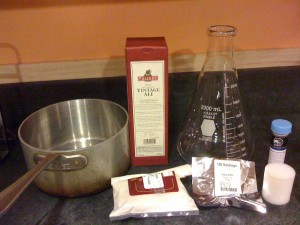
  3. Assemble the following to make a “yeast starter” :
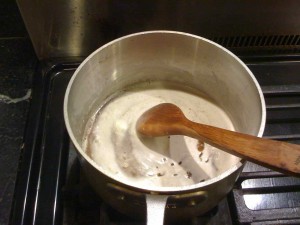
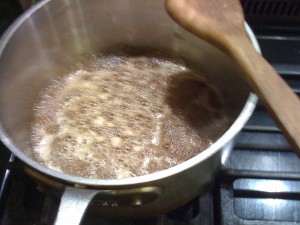
  4. In a saucepan bring to a boil 8 oz of water, add Wheat DME and the hop pellets and boil for a total of 10mins
  5. After 8 mins add yeast nutrient (optional)
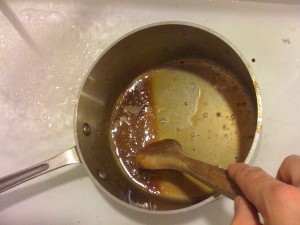
  6. Cool rapidly, I partially submerge the saucepan in a sink full of ice cold water and stir vigorously, this also aerates the liquid
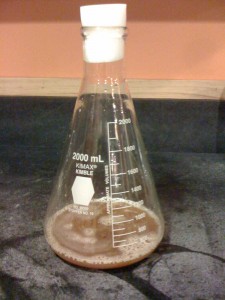
  7. Once the liquid is cooled to 80ºF pour into a clean, sanitized flask or carboy
  8. Add the remaining 20% of the bottle conditioned ale, including sediment, from the bottle you purchased
  9. Insert stopper and airlock and keep at a constant 68-75ºF. The yeast should come back to life within 3-4 days.
Yeast Harvesting Materials

The Equipment

Mixing in the Wheat DME

Mixing in the Wheat DME

Source Ale

Pour drink, saving 20%

Yeast Nutrient

Add yeast nutrient after 8mins

Cooling starter to 80%

Cooling rapidly in cold water

Final product

Transfer to flask, add ale with sediment

Once the yeast is active you can either use it or place in the refrigerator to sleep.  Make sure to keep some back to re-culture again for another brew.  Yeast can stay healthy for up to 3 months in the fridge, so make sure to re-culture a batch before 3 months to keep the strain alive or you will just have to go out and actually BUY beer, how does that work with the budget!

Other resources:

  • For a complete list of breweries where White Labs and Wyeast strains originate you can look here.
  • For a list of bottled conditioned ales capable of harvesting yeast go here.
Share
03 January
1Comment

Water – the forgotten ingredient

Its funny because homebrew authors and bloggers alike talk a lot about yeast, hops and malt but very little time is given to the ingredient that makes up over 90% of a brew – the water.  Water chemistry has a strong influence on the mouthfeel of an ale and has a big say in the performance of the fermentation and final conditioning of an ale.

Major brewing industries have grown up around geologically favorable sites with the right mix of rock type to filter the water from naturally occurring springs and wells and supply the optimum minerals from brew water.  Areas such as London and Burton on Trent in the UK, the Czech town of Pilsen, and the towns of Dortmund and Munich in Germany have very distinct water favorable to the brewing of specific styles of beer. In John Palmers online reference “How to Brew” he outlines how the water chemistry found in these towns is balanced with the malt and hops to make the distinctive beers such as Guiness and Pilsner.

Pilsen – The very low hardness and alkalinity allow the proper mash pH to be reached with only base malts, achieving the soft rich flavor of fresh bread. The lack of sulfate provides for a mellow hop bitterness that does not overpower the soft maltiness; noble hop aroma is emphasized.

London – The higher carbonate level dictated the use of more dark malts to balance the mash, but the chloride and high sodium content also smoothed the flavors out, resulting in the well-known ruby-dark porters and copper-colored pale ales.

Burton-on-Trent – Compared to London, the calcium and sulfate are remarkably high, but the hardness and alkalinity are balanced to nearly the degree of Pilsen. The high level of sulfate and low level of sodium produce an assertive, clean hop bitterness. Compared to the ales of London, Burton ales are paler, but much more bitter, although the bitterness is balanced by the higher alcohol and body of these ales.

There are two important ingredients found in brewing water.  The first is Calcium which helps create the acid required to balance out the alkaline phosphates in the malt.  Acidity is needed to promote enzyme activity in the wort and to promote flavour, clarity and stability to the finished beer. The second ingredient is Magnesium and important yeast nutrient in small doses.

Most homebrewers do not have access to abundant naturally purified fresh spring water or wells. We make do with the towns best, tap water. Unfortunately tap water can contain ingredients that are not favorable to the brewing process. Chlorine is used to prevent the build up of bacteria in the water supply but in high doses can lead to bitterness in beer and can kill the yeast.The good news is Chlorine is highly volatile and can be removed by simply boiling.

So how do we as homebrewers begin to think about the water we use to brew our ales?  A good first step is to grab a copy of your towns water quality report and check the level of hardness (found in the Calcium and Magnesium levels) and the level of Chlorine. In many cases the answer will be nothing, the Chlorine will come out during the boil along with any other impurities and most town water falls within acceptable levels of water hardness.

If you want to check the pH level of your brew water buy a pH testing kit from your homebrew supplier and check the level of the wort during a boil. I take a sample using a turkey baster.  Make sure the wort is properly cooled to ensure an accurate reading.  An optimal reading is in the 5.0-5.5 range.  If the levels are outside you can use calcium carbonate to make more alkaline or an acid.  The pH levels will only change between 0.2-0.3 during the boil, so you will be all set once the pH in the acceptable range.

For those who really want to optimize the water mineral content to match the style of beer being brewed consult the chart and attached spreadsheet on John Palmers site here.

Given this is the BritishBrewer and we focus on classic British ales is there an effective and simple way to replicate the water of a London or Burton?  The quick answer is yes and I have been playing around with various techniques including adding calcium and gypsum.  But I finally stumbled upon a magical little powder called Burton Salts, containing all the essential minerals in a single package.  The process is simple, for a 5 gallon batch:

  • The night before you intend to start the brew bring to the boil 6.5 gallons of tap water in the kettle, this will remove all the unwanted chemicals and purify the water
  • Add the recommended dose of salts, then check the pH (again ensure the water has cooled). This is a bit of a chicken and egg situation because it is hard to predict the final pH level of the wort once malt and hops have been added.  I find a pH level for the brew water of 5.8 works for me.  Remember to check the wort pH on brew day and make adjustments for your next brew. You can also adjust the pH of the wort by adding more salts.
  • Now boil the water for 15 mins
  • Once boiled leave the water to cool ready for brew day

Water treatment really does make a difference, the brew flavours are sharp and fresh and the colour brighter.  Have fun and over the next few weeks we will begin a review of different malt types and start a series of deeper dives into some favorite British Brew styles, their history and some classic recipes.

Share
20 December
1Comment

What the “flocculation” are you talking about?

Hopefully the title of this blog post grabbed your “attenuation”.  For those who don’t get the joke, this is a post about yeast.  We provided a 101 background in the “Getting Started Series” post but now its time to dig in a little deeper into this magical little fungus.

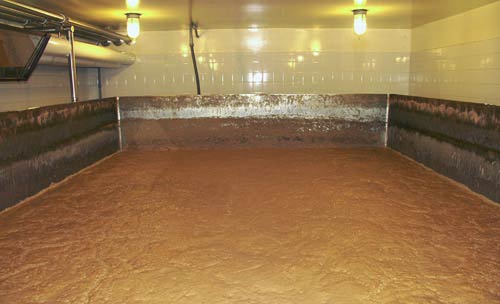
Top fermenting yeast in an open fermenter, smells yummy

Top fermenting yeast in an open fermenter, smells yummy

Yeast is truly a magical mould, there were times in our past, before purification systems, when water was unsafe to drink. Ale and wine were seen as staples and a safe form of nutrition (I would argue that with the quality of our food today homebrewed ale remains a safe form of nutrition). Yeast is still considered a powerful nutrient, rich in both B-complex vitamins and an anti-bacterial being the basis of penicillium notatum, the foundation of modern antibiotics. But to beer drinkers around the world yeast is know as the magical fungus responsible for converting sugar into alcohol and putting bubbles in our beer.

God made yeast, as well as dough, and loves fermentation just as dearly as he loves vegetation. – Ralph Waldo Emerson

Types of Yeast

First it is important to differentiate between the two styles of yeast used to brew.  The first is saccharomyces uvarum, often called lager yeast, in which the yeast settles and ferments on the bottom of fermenter.  This type of yeast works at much lower temperatures and ferments more of the sugar leaving a drier, crisper beer.  This yeast is typically used to brew Pilsners and Lagers. It is believed there are very few strains of lager yeast with all lager yeast descending from only 2 primary strains.

The second type of yeast is saccharomyces cerevisiae, often called ale yeast, in which the yeast rises to the surface of the fermenter causing a thick layer of foam called krausen.  This is the type of yeast used to brew all British and most European beers.  There are numerous strains of this type of yeast, each providing very distinctive characteristics you should consider when planning a recipe of which I have highlighted 5 important ones below:

1) Flavour – Ale yeast strains work by synthesizing the sugars and other enzymes derived from the malt. The flavours most commonly associated with ale are esters, resulting in an “ale taste,” as well as more-easily-described flavours such as apple, banana, and pineapple. Combinations of yeast strain, malt, and temperature can be responsible for chemicals causing other flavours, such as a cidery taste or butterscotch.

2) Attenuation – Is a percentage that measures the amount of sugar converted into alcohol during the fermentation process. Lower attenuating yeasts will leave more sugars behind leading to a sweeter taste.  Higher levels lead to a drier taste with alcohol notes.  Most yeast manufactures provide an observed attenuation level for each yeast strain which a brewer can then use when considering the target ABV and taste of a recipe.  I find it helpful to keep your own chart of observed attenuation for the yeast strains you use.  The ranges provided by the suppliers are fairly accurate but will vary depending on your own brewing conditions.  No one wants a yeast to under-perform.

3) Flocculation – Refers to the clumping together of yeast cells once the sugar has been fermented into alcohol.  As the yeast cells clump they begin to fall pulling down other matter suspended in the beer. Larger clumps tend to pull down other particulates suspended in the beer and lead to brighter, clear ales without the need for filtration or additives, know as “high” flocculation. Lower levels or “low” flocculation yeast might need additions such as Isinglass during the secondary fermentation phase to help pull down some of the suspended yeast or proteins left behind.

4) Alcohol Tolerance – Most yeast suppliers supply an ABV tolerance level yeast can reproduce under.  Ales with a high ABV such as Imperial, Barleywine or Old Ales need to be fermented with yeast strains with a high ABV tolerance say 10%. Some varieties of Barleywine that are bottle conditioned will require the use of Champagne yeast to ensure carbonation is successful in the bottle.  Remember to check the tolerance of your chosen yeast is higher than the target ABV.

5) Fermentation Temperature – Refers to the recommended temperature the yeast will perform optimally.  Too warm can lead to off flavours in the ale, too cold and the yeast head on top of the fermenter can fall prematurely and cause a stalled fermentation.

The most important stage for yeast in the brewing process is being pitched into the primary fermenter to begin its work.  Make sure the temperature of the wort is optimal at around 75-80°F, the wort is well aerated to provide the yeast cells the oxygen they need.  Most important make sure the yeast is working.  This can be done by creating a yeast starter.  Bring a pint of water to boil, add some DME, and boil for 15 mins.  Place in a jug, cool, and pitch the yeast. Insert and airlock and watch the yeast go to work.  A healthy yeast will be fully active within 24 hours.

Remember you can replace a yeast but you cannot replace a brew gone bad.  Hope this information helps, I find it most useful when selecting the right yeast to use for a specific recipe. Next up in our deeper dive into ingredients will be the water.

Share
05 December
2Comments

Beer Styles – Creating your own English Pale Ale recipe

I noticed in my first recipe post (here) that I inserted jargon around beer style categories and used acronyms such as BJCP without actually giving any detail as to meaning and importance. My bad, but it got me thinking that a write up on beer classifications would provide a great framework to begin discussions around recipe creation as we begin to build and review different recipes.

BJCP Logo

BJCP Logo

The Beer Judge Certification Program (BJCP) is a non-profit organization whose purpose (taken from their website):

…is to promote beer literacy and the appreciation of real beer, and to recognize beer tasting and evaluation skills. We certify and rank beer judges through an examination and monitoring process.

The BJCP was founded in 1985 and has administered the Beer Judge Examination to 5,299 individuals worldwide. 3,126 are currently active judges in the program, with 481 holding the rank of National or higher. Since we started keeping detailed records, our members have judged over 510,871 beers and we have sanctioned over 3,805

For the current year (2009), 58 exams have been registered. Exams have been given to 570 examinees. Organizers have registered 310 competitions. More detailed statistics can be found in the Database Reports section of the website. competitions.

(My italics) By creating a set of standards for judging beer the BJCP has created a defacto standard for classifying beer now used by almost every homebrew calculator, book, website, and in almost all beer competitions.  These classifications provide a great starting point for the new homebrewer to begin researching their own new recipes.

Each style listed by the BJCP contains a number of sub-categories outlining general characteristics, guidelines, and requirements an ale is assessed against when placed into competition.  These guidelines include aroma, flavour,  appearance, and mouthfeel.  Assessment requirements include Specific Gravity (OG & FG), colour (SRM), bitterness (IBU’s), and Alcohol By Volume (ABV).  A recommended range of values is provided for each of the above.  These guidelines therefore provide an excellent place to start when beginning to craft your own recipe.

Given the focus of this blog lets focus on the various categories of British ale. A complete style guide can be found here.  Arguably the most popular British Ale style is “Category 8 – English Pale Ale”.  English Pale Ale is broken down into 3 sub-categories:

  • Standard/Ordinary Bitter
  • Special/Best/Premium
  • Extra Special/Strong Bitter.

It is not uncommon to hear the phrase “A pint of Best”, or “pint of your Ordinary” in an English Pub.  Each brewery would typically have one of each of the 3 categories, each with its own unique flavour, aroma, colour and strength.

Standard/Ordinary

Vital Statistics: OG 1.032 – 1.040
IBU 25-35 FG: 1.007 – 1.011
SRM 4 – 14 ABV 3.2 – 3.8%

So lets translate the above table into English.  With a recommended ABV of 3.2-3.8% these styles of ale are low alcohol making them light and easy to drink.  The low alcholol level accounts for a lower OG.  With a FG around 1.007 most of the sugars have been converted into alcohol and with IBU’s in the high 20’s-30’s give these ales quite a dry and bitter taste. A higher ABV would smooth the bitterness out but this is not the case here.  The SRM dictates a light yellow to copper colour so a light Crystal Malt may be used giving us a hint of caramel flavour.

Some commercial examples of Ordinary Ale include: Fuller’s Chiswick Bitter, Adnams Bitter, Young’s Bitter, Greene King IPA, Tetley’s Original Bitter, Brakspear Bitter, Boddington’s Pub Draught (All good session beers and great with pub food).

Special/Best/Premium

Vital Statistics: OG 1.040 – 1.048
IBU 25-40 FG: 1.008 – 1.012
SRM 5 – 16 ABV 3.8 – 4.6%

As the above table highlights a pint of Best is very similar to the Ordinary. The similar bitterness profile combined with the higher ABV leaves a smoother, more balanced malt flavour but with the bitterness still coming through. A high FG still gives a dry ale but not as dry as the ordinary and the darker colour (gold to copper) provides for potentially more crystal malt or a darker strain and a stronger caramel flavour.

Some commercial examples of Best Bitter include: Fuller’s London Pride, Adnams SSB, Young’s Special, Shepherd Neame Masterbrew Bitter, Ruddles County Bitter (all have been personal favorites of mine).

Extra Special/Strong Bitter

Vital Statistics: OG 1.048 – 1.060
IBU 30-50 FG: 1.010 – 1.016
SRM 6 – 18 ABV 4.6 – 6.2%

Strong Bitter is most commonly served as an ESB and is probably my favorite overall English Pale Ale category.  This ale is the most balanced in flavour between hop and malt thanks to both the high OG and IBU.  The deeper golden to deep copper colour gives a richer caramel taste with the opportunity to use some of the darker or roasted malts in small quantities giving a nuttier, biscuit like quality.  This category provides the greatest flexibility to the brewer given the wide range of values which is reflected in the wide variety of ESB’s on the market.

Some commercial examples of ESB include: Fullers ESB, Adnams Broadside, Shepherd Neame Bishop’s Finger, Young’s Ram Rod, Samuel Smith’s Old Brewery Pale Ale, Bass Ale, Whitbread Pale Ale, Shepherd Neame Spitfire, Marston’s Pedigree, Morland Old Speckled Hen, Greene King Abbot Ale, Bateman’s XXXB, Shipyard Old Thumper.

Bringing it all together

So now its our turn to figure out our own British Bitter recipe.  The easiest way to begin is to use a brewers calculator, such as the one found at  Hopville.com, and construct a recipe.  As we add ingredients the calculator updates SRM, IBU, ABV, OG and FG helping us structure the perfect ale.  To check whether your ale conforms to your chosen category simply select your style in the calculator and it will  compare your recipe against the BJCP guidelines and provide the appropriate feedback.

Remember as we are only focused on extract based recipes for English Pale Ale use Light Dry Malt Extract as the base malt with maybe some Amber DME for a darker colour. For specialty grains play around with the various degrees of Crystal malt for colour and flavour, maybe a small amount of black or toasted malt such as Victory for nutty overtones.  For hops Fuggles, Target, Kent Goldings, and Williamette are all good places to start. To get going and perfect your own brew.

Of course there is no substitute for actually trying one out.  So give it a shot and please post recipes in the comments or email me with a description and I will post them.
Share
24 November
4Comments

Getting Started Pt II – Ingredients

I have just received delivery from Northern Brewer of all the ingredients I will need to start my next couple of brews. (Look for an “On Tap” update in the coming days)  Since I bought a second carboy I like to use one for a regular session brew and the other for some more experimental ales that often require longer conditioning times, like the 90 minute IPA I have cold conditioning right now.

Well the delivery reminded me I need to post the Part 2 (out of 3) in my “Getting Started” series.  Now we have the equipment we need to create most styles of ale its time to review the basic ingredients.  This post is meant to be an introduction and we will be getting into the details and varieties as our journey progresses.

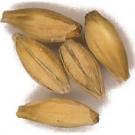
English Marris Otter

English Marris Otter

The major ingredient in homebrew is malt.  Malt is a significant factor in colour (it is British Brewer after all), taste, and alcohol level in ale.  Simply put malt is the product of soaking grains in water until they begin to germinate. The grains are then heated to halt the germination process.  This 2-stage “malting” process causes the grains to produce essential enzymes required to modify the grains starch into sugars and enable the yeast to do its job.  Different varieties of grain are used each with a specific flavour or colour characteristic. Certain varieties are toasted or smoked to produce darker, nuttier or smoked flavour characteristics.  We will get into the various types of grain some other time, especially when we review recipes and the types of malt they are based on.  Basically there are two categories – the Base Malt, and Specialty Malt. Base malts make up the bulk of the a batch and are typically based from one of 2 types of barley, either 2-Row or 6-Row.  These grains are very efficient at breaking down the starches into sugar.  Specialty malt provides a small amount of sugar but its main function is to provide, colour, flavour and body to the finished ale.

Ale made by the professionals is based on an “all-grain” process using hundreds of pounds of malt in the process.  Modern homebrew technology has evolved over the years to enable us mere mortals to create all-grain based brews but the process is long, complex and requires a relatively large quantity of grain. As yet I have not attempted an all-grain process (time, money, space reasons) and instead use a combination of malt extract and a smaller amount of specialty grains.

Malt extract comes in two varieties, Dry Malt Extract (DME), and Liquid Malt Extract (LME).  Both replace the need for a large quantity of base malt grains.  Most suppliers provide malt extract manufactured with some flavor and color characteristics required to produce most of the popular ale styles today.  Most of the recipes we will be working with will use a combination of specialty grains and malt extract.

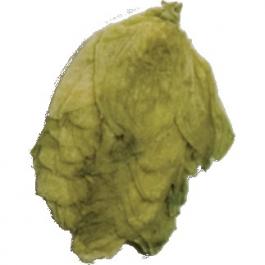
Fuggle Hops

Fuggle Hops

Another significant ingredient are Hops which contribute significantly to the taste and aroma of an ale. Hop resin is made up of alpha and beta acids.  Alpha acids are responsible for the bitter taste in the ale and tend to be put in at the beginning of the brew process.  The higher the alpha the more bitter.  Beta acids have little effect to the flavor of an ale instead providing the aroma characteristics and are added to the brew in the middle and end of the brew process.  Hops are supplied dried or as pellets. I prefer pellets as they have a longer shelf life.  Popular English hop varieties include Kent Goldings and Fuggles.

Dried Yeast

Dried Yeast

Finally the magic ingredient, the bacteria that converts the sugar from the malt into alcohol during the fermentation process, the brewers yeast.  Yeast is also a significant contributor to the taste of an ale.  There are two main types of brewers yeast, top-fermenting and bottom-fermenting.  Top-fermenting yeast causes a foam to form on the top of the brew (wort) during the fermentation process, prefer higher temperatures (61 – 75 F), produce a fruitier flavour, and a higher alcohol content. These yeasts are typically used in ales.  Bottom-fermenting yeast works at lower temperatures, ferments more sugars, creating a dry crispier taste and is commonly used in lagers.  Yeast requires oxygenated wort in order to produce healthy yeast cells.  Today yeast is sold to homebrewers in either a dried or liquid form with hundreds of different strains replicating many of the strains used all over the world by professional breweries.

There are other ingredients used in a brew, from sugar, irish moss, to speciality additions such as oak chips, spices and fruit. There are infinite possibilities of colour, taste, aroma, and strength.  This is what makes homebrewing so much fun and if you can boil water on a stove and follow a simple recipe you can make great tasting ale.  Next time we will introduce a basic brewing process following a simple recipe to create a British staple – Best Bitter.


Share